Sources & Environments in Enterspeed
Start by logging into Enterspeed: https://app.enterspeed.com
In this step, we're going to:
- Create sources
- Create and configure domains
- Create environment clients
Creating sources
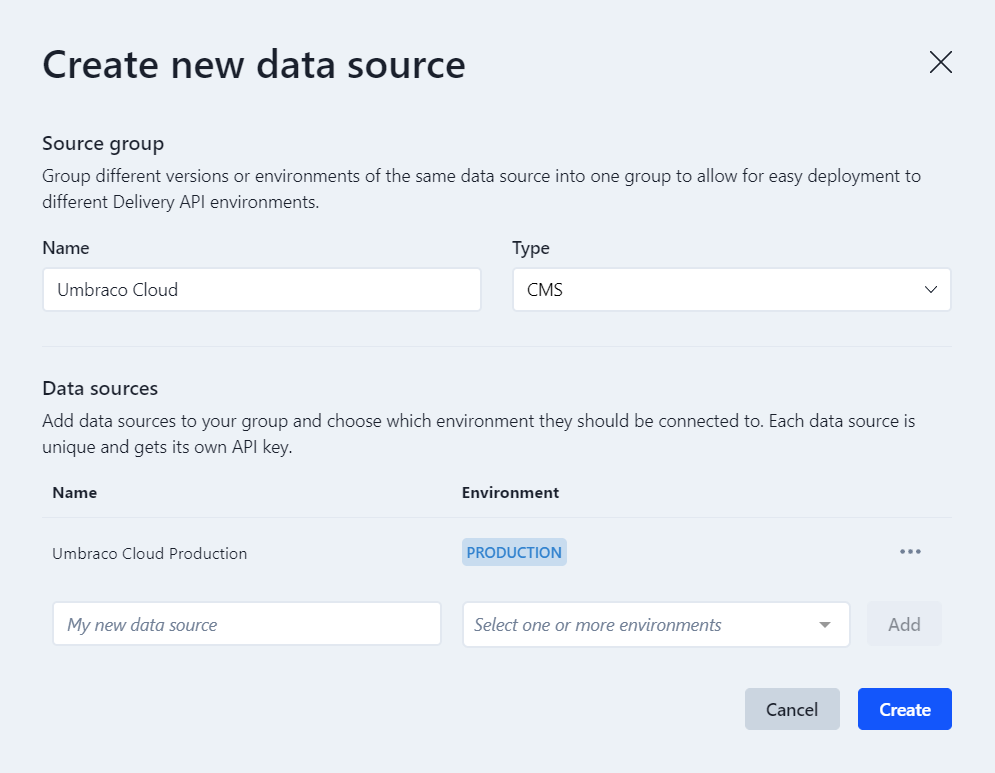
Go to Data sources under Settings and click the Create group button. This will open a modal that allows you to create a new source group. A source group can have multiple data sources attached, which each have its own unique API key.
Give your source a name (e.g. Umbraco Cloud) and select CMS in type. Afterward, add a data source by giving it a name (e.g. Umbraco Cloud Production) and select an environment (e.g. Production), then click the Add button. Lastly, click on the Create button.
An API key is now generated. Save the API key for now (e.g., in a notepad document) - you'll need it when configuring your Umbraco project.

Creating and configuring domains
Go to Domains under Settings -> Environment settings and click the Create button. Give your domain a name (e.g. DomainName.com) and click on the Create button.
Domains are used in Enterspeed as a way of filtering your data if you have multiple data sources. You can name it whatever you like, but we recommend using the same name as your domain name for ease of use.
Afterward, click on the three dots next to the domain name and select Edit hostnames. Click Create new and insert the URL you're going to use for your new project. We're going to use the same hostname when configuring Umbraco.
If you're working on your project locally, you can insert for instance localhost:3000.
If you're working on an environment like Netlify you can insert the site URL for instance https://my-new-kickass-enterspeed-project.netlify.app
Creating environment clients
Navigate to Environment clients under Settings -> Environment settings and click the Create button. Give your environment client a name (e.g. My Next.js Application) and select the Environment you just created. Afterward, click on the Create button.
Also save this API key for now (e.g., in a notepad document) - we’re going to use it in our Next.js application.
Next to your new environment client click on the three dots and select Edit domains. Select the domain you just created and click the “Save changes” button.