> ## Documentation Index
> Fetch the complete documentation index at: https://docs.enterspeed.com/llms.txt
> Use this file to discover all available pages before exploring further.
# 2. Configuring Umbraco
# Configuring Umbraco
In this step, we're going to:
1. Install the Enterspeed Umbraco package
2. Import our demo content
3. Configure our hostname
4. Seed content to Enterspeed manually
## Installation
### Installation for Umbraco 7 & 8
Sign into your Umbraco instance and navigate to the backoffice.
In order to send data to Enterspeed, we need to install the Enterspeed Umbraco package. Go to the **Packages** tab in the top menu and search for **"Enterspeed Umbraco source integration"**. Select the package and hit install.
For production setups, we recommend installing the NuGet package instead. You can find it here: [Enterspeed.Source.UmbracoCms.V7](https://www.nuget.org/packages/Enterspeed.Source.UmbracoCms.V7/) or [Enterspeed.Source.UmbracoCms.V8](https://www.nuget.org/packages/Enterspeed.Source.UmbracoCms.V8/)
### Installation for Umbraco 9+
Since Umbraco 9 the "packages installation"-feature from the backoffice has been removed. Because of that, we need to install the following NuGet package:
[Enterspeed.Source.UmbracoCms](https://www.nuget.org/packages/Enterspeed.Source.UmbracoCms/)
## Configuring
Go to the **Settings** tab in the top menu and select **Enterspeed settings**.
 1. Set the **Enterspeed endpoint** to [https://api.enterspeed.com/](https://api.enterspeed.com/)
2. Set your media domain (optional).
3. Insert your API key generated in the Enterspeed-app under "Sources".
4. Test the connection and save the configuration afterward.
Your data will now be synced to Enterspeed each time you publish content.
You can view synced data in Enterspeed by navigating to **Source Entities** and selecting your source (the name you provided when creating it) in the **Source** dropdown.
## Importing content from the demo project
If you wish, you can import the Umbraco content from our [demo project](https://enterspeed-umbraco-nextjs.netlify.app/).
### Importing demo content for Umbraco v9+
Since Umbraco 9 the "packages installation"-feature from the backoffice has been removed. Because of that, we need to install our NuGet package:
[Enterspeed.Demos.UmbracoCms.FairyTales](https://www.nuget.org/packages/Enterspeed.Demos.UmbracoCms.FairyTales/)
The NuGet package will import content, data types and document types required for this demo on startup of your application.
After package installation build and start your application.
### Publishing and syncing imported demo content
Publish the site by navigating to the **Content** tab, and select the **Home** node.
Then click **the arrow** on the green "Save and Publish" button in the lower right corner, and select "**Publish with descendants**".
Check the "**Include unpublished content items**" option, and click the "**Publish with descendants**" button.
1. Set the **Enterspeed endpoint** to [https://api.enterspeed.com/](https://api.enterspeed.com/)
2. Set your media domain (optional).
3. Insert your API key generated in the Enterspeed-app under "Sources".
4. Test the connection and save the configuration afterward.
Your data will now be synced to Enterspeed each time you publish content.
You can view synced data in Enterspeed by navigating to **Source Entities** and selecting your source (the name you provided when creating it) in the **Source** dropdown.
## Importing content from the demo project
If you wish, you can import the Umbraco content from our [demo project](https://enterspeed-umbraco-nextjs.netlify.app/).
### Importing demo content for Umbraco v9+
Since Umbraco 9 the "packages installation"-feature from the backoffice has been removed. Because of that, we need to install our NuGet package:
[Enterspeed.Demos.UmbracoCms.FairyTales](https://www.nuget.org/packages/Enterspeed.Demos.UmbracoCms.FairyTales/)
The NuGet package will import content, data types and document types required for this demo on startup of your application.
After package installation build and start your application.
### Publishing and syncing imported demo content
Publish the site by navigating to the **Content** tab, and select the **Home** node.
Then click **the arrow** on the green "Save and Publish" button in the lower right corner, and select "**Publish with descendants**".
Check the "**Include unpublished content items**" option, and click the "**Publish with descendants**" button.
 This will publish the entire site, and send the data to Enterspeed.
Go to your Enterspeed-project and navigate to Sources --> Sources entities to verify that the data have synced.
## Configuring your hostname
Go to the **Content** tab and click the three dots next to **Home**. Click the **Do something else** button at the bottom and select **Culture and Hostnames**.
Insert the same domain name as the one you entered when you configured your **hostname** in Enterspeed.
This will publish the entire site, and send the data to Enterspeed.
Go to your Enterspeed-project and navigate to Sources --> Sources entities to verify that the data have synced.
## Configuring your hostname
Go to the **Content** tab and click the three dots next to **Home**. Click the **Do something else** button at the bottom and select **Culture and Hostnames**.
Insert the same domain name as the one you entered when you configured your **hostname** in Enterspeed.
 ## Sending content to Enterspeed manually
When you click **Save and publish** in Umbraco, the content will automatically be sent to Enterspeed. But since we just updated our hostname, all of our content now has a new URL, which we need to be synced to Enterspeed. We do this by manually triggering an update.
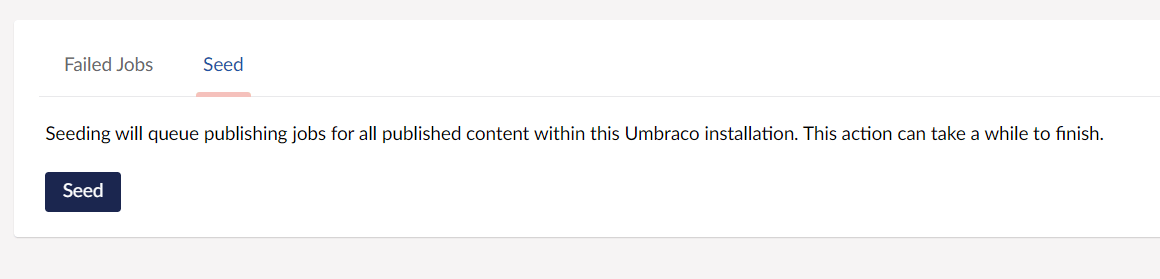
To send content manually to Enterspeed go to the **Content** tab in the top menu. Click the **Enterspeed content** tab and select **Seed**.
To send published content to Enterspeed, click the **Seed** button. This will queue a transfer of all your Umbraco content to Enterspeed.
## Sending content to Enterspeed manually
When you click **Save and publish** in Umbraco, the content will automatically be sent to Enterspeed. But since we just updated our hostname, all of our content now has a new URL, which we need to be synced to Enterspeed. We do this by manually triggering an update.
To send content manually to Enterspeed go to the **Content** tab in the top menu. Click the **Enterspeed content** tab and select **Seed**.
To send published content to Enterspeed, click the **Seed** button. This will queue a transfer of all your Umbraco content to Enterspeed.