> ## Documentation Index
> Fetch the complete documentation index at: https://docs.enterspeed.com/llms.txt
> Use this file to discover all available pages before exploring further.
# Getting started
## 1. Installation
[Download the latest release](https://github.com/enterspeedhq/enterspeed-cli/releases) and select the asset for your operation system.
Also, you can add the location to your es-cli in the environment path to make the CLI available globally if you want.
## 2. Help options
If you don't want to go to the [documentation](https://github.com/enterspeedhq/enterspeed-cli) every time you are using new commands, you can use the help option to see available commands and options
```
es-cli -h
```
```
Description:
Usage:
es-cli [command] [options]
Options:
-v, --verbose verbose
--apiKey
--version Show version information
-?, -h, --help Show help and usage information
Commands:
login Login using OAuth
tenant Tenant
environment Environment
environment-client Environment client
domain Domain
source-group Source group
source Source
views Generated views
source-entity Source entities
schema Schemas
deployment
```
## 3. Authentication
Before you can call any of the commands you must first authenticate. You do that using the `login` command.
This will open a browser window where you can sign in with your Enterspeed credentials.
```
es-cli login
```
It's also possible to authenticate using an **[API key](https://github.com/enterspeedhq/enterspeed-cli#api-key--authentication)**. This is especially useful if you are using the CLI in a pipeline context like CI/CD.
## 4. Setting the right tenant
After authenticating the first thing you must do, is to make sure you are working on the right tenant.
To get a list of all available tenants, use the following command.
After that, you can set the tenant using the id from the list.
```
es-cli tenant set gid://Tenant/5197b4d4-6bdf-4f63-a91b-872905ad1941
```
## 5. Cloning schemas from Enterspeed to your local machine
Now that we have authenticated and selected the right tenant we can start working with the schemas.
You can use the help options for the individual commands as well to get specific help for e.g. the schemas: `es-cli schema -h`
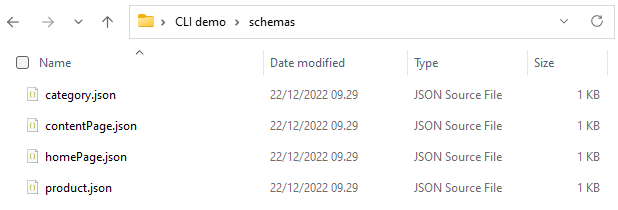
The `schema clone` command will clone all the schemas from your tenant to your local machine so you can start working with your schemas locally.
```
es-cli schema clone
```
This will create a folder called schemas with all your schemas.
 ## 6. Saving a schema
Now open up one of your schemas, make a change to the schema and save it. Once you save the schema in your editor, note that the schema is only saved on your local machine.
To save the new changes to your schema in Enterspeed you use the `schema save` which takes the alias of the schema as an argument, in this case `product`.
```
es-cli schema save product
```
Now if you open up the same schema in Enterspeed you can see the schemas have been updated in Enterspeed.
## 7. Deploying a schema
The last step for this guide is to deploy the schema to Enterspeed so that the changes to our schema will be reflected in the views.
To deploy a schema we would need to once again provide the alias of the schema that we want to deploy, and also we would need to provide the environment, that we would deploy our schema to.
```
es-cli schema deploy product -e "Development"
```
This was a quick guide to show how to get started and to show just some of the tasks you can do with the CLI.
## 6. Saving a schema
Now open up one of your schemas, make a change to the schema and save it. Once you save the schema in your editor, note that the schema is only saved on your local machine.
To save the new changes to your schema in Enterspeed you use the `schema save` which takes the alias of the schema as an argument, in this case `product`.
```
es-cli schema save product
```
Now if you open up the same schema in Enterspeed you can see the schemas have been updated in Enterspeed.
## 7. Deploying a schema
The last step for this guide is to deploy the schema to Enterspeed so that the changes to our schema will be reflected in the views.
To deploy a schema we would need to once again provide the alias of the schema that we want to deploy, and also we would need to provide the environment, that we would deploy our schema to.
```
es-cli schema deploy product -e "Development"
```
This was a quick guide to show how to get started and to show just some of the tasks you can do with the CLI.